Tuesday, October 29, 2013

Autumn Art Class- Owl & Cat scratch art round 2

Back and forth I went between Day of the Dead Skulls (Dia de Muertos) & Owls for this group's scratch art...since the first groups owls turned out so cute I finally settled on owls and gave them the option of black cats. I was unsure about doing Day of the Dead skulls mainly due to the fact I live in the Bible Belt and was uncertain how their art would be taken by family members. So, I chose not to possibly offend anyone (this time) and went the safe route.

We went on a leaf hunt around my yard and each kiddo found a leaf they liked. They practiced sketching their leaf and then on brown construction paper used a paint pen to draw it again.

This fella chose a maple leaf.

And this fella chose a gynormous leaf!

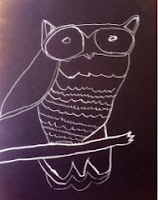
Yes, completely unrelated to owls & cats but To get the concept in their head that:
All lines are final!
Take your time! 
Draw big!
Much like I harped on with the first crew.

After practicing several different types of owls & cats, I handed them their boards & scratchers and they set to work and did fantastic! 


Friday, October 25, 2013

Autumn Art Class- Birch Trees

Color Theory. Something I still fully don't understand, possibly because the last formal class I had was in 8th grade, then the art teacher retired and the school turned his classroom into a computer lab, used the darkroom as storage for unwanted, dusty text books and tossed all his supplies in the dumpster.
Bitter? 
Slightly.

Ah, but a glimmer of hope happened with this lesson and I may be getting my brain around some of these concepts!

We started in our art journals with the basics: primary, secondary, cool, hot, and then branched out to analogous. I still don't know if it is pronounced with a short or long O. Oh well.

I had the girls pick one of the analogous color schemes they liked such as: yellow/orange/red or blue/green/yellow but then narrow it down to just 2 of those colors like orange/red or blue/green. 

So.....technically, I don't know if that still qualifies as analogous since it suppose to be 3 colors that are neighbors. I had them choose those because I knew if they were blended together it wouldn't create mud. 

To ready our canvas the girls layered painters tape which would become the trucks & branches. Putting down the thicker tape first to give us the right perspective.

Then, using acrylic painted they painted one color, just on the top half then the other color on the bottom half. 

Lastly blending the two together by either mixing their left over paint or (for some who had lots of paint on their canvas) blending the two sides together with a new brush to create Blue/blue-green/green voila! Either way worked beautifully.

Analogous colors woohoo! 
Take that 8th grade art education! Lol 

We jazzed it up with silver & gold dots and circles created with sponge brushes and baby food jars. Yes, one of the many uses I've found for those handy little glass jars.


Peeling ONE layer of tape off at a time they used an old gift cards to create the texture of the bark. To do this they put a bit of black paint on the end of the card, lined it up to the edge of the tree and drug it across. 

And after all the tape was gone, masterpieces emerged! 


What really amazed me was how their color choices completely changed the mood of their painting, one girl said her's reminded her of spring in China, another said her's was like a cold winters night, and we all agreed that the pink and orange one reminded us of India! Things that were not on my lesson plan by any means but it was so neat to see how color choice can affect something! 

I got this lesson from Angela Anderson's Art blog that has fantastic art lessons for kids check out her website here.

Sunday, October 20, 2013

Autumn Art Class- Fall Trees / perspective painting

I saw this Leonoid Afremov painting on Pinterest several months ago and timidly decided to add it to my autumn line up. 


This lesson I knew would be the biggest challenge I'd attempted with 7-12 year olds because of time constraint, mixing paints, and several layers. So, we started right off the bat with a few drawing perspective exercises then dove right in to painting. 

Didn't take many pictures because we were painting each step together but we started by lightly drawing our horizon & our lane (or creek as some saw it) added an area of green than got lighter towards the middle and painted a rainbow of hot colors for our ground. Whew that was a long sentence!!! 

Second, the kids finger painted a layer of hot colors in the sky.

One found their nose more suitable than fingers..... 

Then, we painted some hot colored dashes on our forest floor to imitate leaves on the ground. Which there is no picture to show this step unfortunately.

Next, they painted their tree trunks & limbs keeping in mind that the closer an object is the bigger, and the further away the smaller. 


Lastly, they got back in the rhythm (literally) of finger painting the leaves. Towards the end most were using all digits and tapping out a groovy beat lol

Here they are!! Aren't they amazing!!

Sadly, I realized I forgot to take pictures of all the individual pieces AFTER cars were pulling out of my driveway. Sigh. But a few parents snapped some! Yay!


Autumn Art Class- scratch art owls

I splurged for this lesson and purchased artist grade scratch art board and metal scratchers and boy am I'm glad I did!  

We started class by coloring a page in our art journals, painting over with tempera and going on a search in my yard/chicken coop/pasture for some pieces of inspiration. Some girls found a feather and others a leaf they liked. When our journal pages where dry, (with the help of my handy dandy hair dryer) we used metal scratchers to draw our design. Thrilled isn't a word I'd used to describe the results but I knew they'd be better with the scratch boards. 

To prepare for that we practiced drawing several types of owls. Here was my example sheet they got and we went through each one and practiced. 


After trying out each owl all, the girls picked the one they liked best and drew it again but this time much larger.

After stressing that scratchers do not come with erasers, all lines are final, to take your time, and draw big, I handed them a board and scratcher and held my breath lol and to my joyous surprise they listened!


They loved this activity and I really think they slowed down because it was such a different feeling and texture than simply drawing with a pencil. 


One amazing flock of owls and girls!

Autumn Art Class- Watercolor Spiderwebs

Little apprehensive when I chose to do this lesson because watercolors aren't my first choice (or second or even sixth) when making art and I'd never used masking fluid. But I am glad I took the risk. 

We practiced 4 different ways to make spiderwebs. Starting with basic and trying one more detailed. 


The weather was splendid so we strolled down the pasture to my parents dock that has great spiderwebs. The kids picked one they wanted to sketch and I sprayed the web with water so it would be more visible in the bright sunlight. No spiders were harmed in the making of any sketches.

After that we set to work testing out the masking fluid, which creates a barrier when it dries, meaning that the underneath stays white. You'll see what I mean in a bit. I had never used it besides trying it out for this lesson so I was nervous to see the results. The kids kept their brushes moist and painted the masking fluid on their canvas in the shape of a web. 

When it dried they picked either hot colors or cool colors to paint their canvas.


After showing proper watercolor usage, I let them choose what they thought would look best as far as color placement. Some where very deliberate choices, while others were a bit more, ummm...free!


This project took a while to dry so we busted out my handy dandy hair dryer (one more plus for having class at my house) and dried them speedy fast! 


When the canvases were dry the kiddos pealed the masking fluid off (which had turned into a solid) and it was SO fun seeing their reactions! 


Lastly, they added a spider with sharpie and we called these masterpieces finished!